
SubViews are a sub-collection of model objects. They are very useful for breaking up very large designs into smaller, easier to digest pieces. If you need to brush up on the topic a bit, try these posts.
I recently received a note from a user, we’ll call him ‘Galo’ – who was having problems figuring out how to add a table to an existing subview.
It actually took me a few minutes to figure out. And ‘Galo’ actually figured it out on his own as well. But just in case you lack the patience or time to go through this puzzle, let’s show how easy it is to add and remove objects to and from SubViews.
No Existing SubView – Create And Add Objects
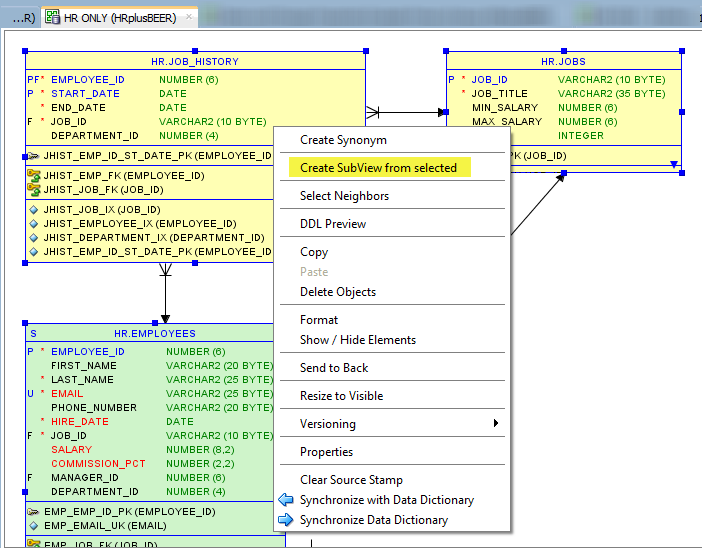
You can multi-select objects in the diagram, right-mouse-click, and say ‘Create SubView from selected.’
You can also Create a Subview from Neighbors – a nice trick/click off of the model tree. Basically allows you to pick one driving object, and say take this and any related objects and move to a subview.
Add An Object to an Existing SubvView
This is where Galo and I got stuck. But it’s intuitive, once you do figure it out 🙂
Removing Objects from a SubView
Right-click on the object in the diagram, right-mouse-click, ‘Delete View.’ This will remove it from the SubView ONLY. If you say ‘Delete Object,’ it will remove it from the model entirely.
If you use the ‘Delete’ context menu from the SubView item in the tree – it again deletes the object from the design entirely! You can always UNDO this 🙂
Version 4.0.1 Makes it a Bit Easier
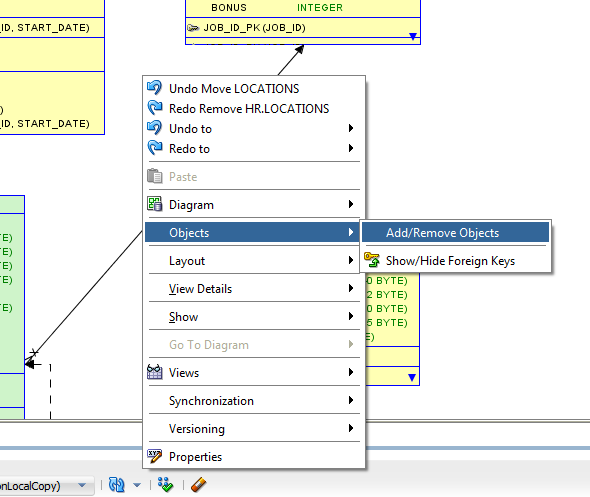
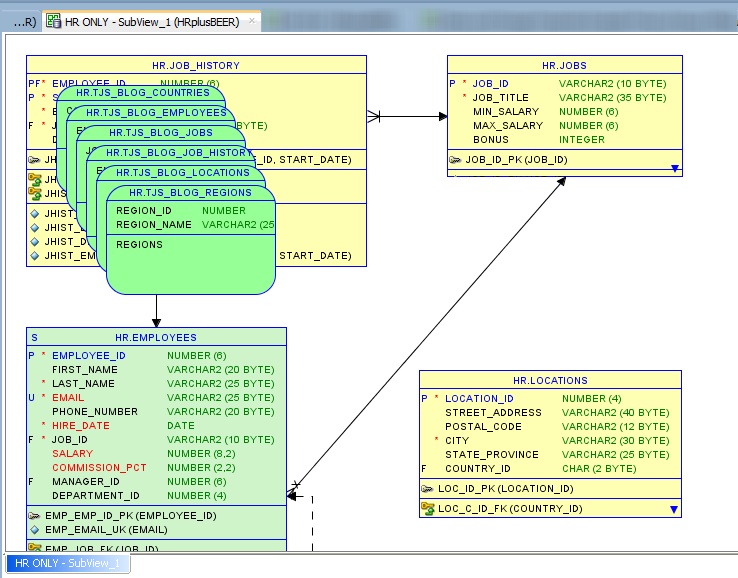
In the latest version, there’s a new dialog to manage what’s in and out for a SubvView.
And then you get this:
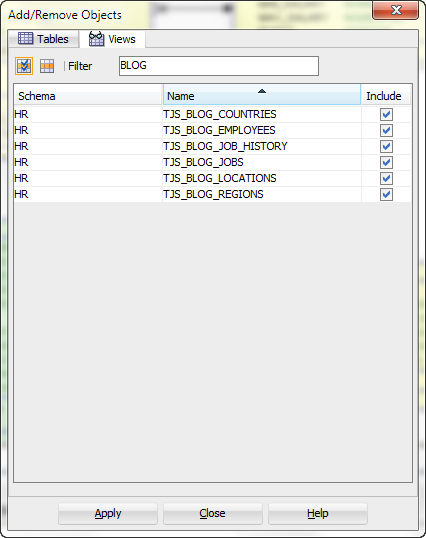
I’ve asked for every view with the text ‘BLOG’ in the name. I can then use the ‘Select All’ button and say ‘Apply.’ Voila!
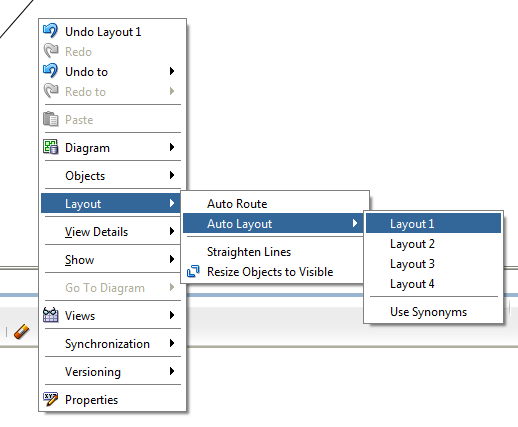
Don’t forget you can use the ‘Auto Layout’ to arrange your diagram objects to a more pleasing set of coordinates. Just right-click in the diagram to try the 4 different automatic layouts.


6 Comments
After creating subviews & moving objects around on a large model, my model is a bit of a mess.
The layouts organize things a bit better in rows (after picking one, nothing changes with the 3 others though).
Is there a way to “reflow” the tables on a view/subview so they’re again organized in rows by table name alphabetically?
(I believe this happened when the model was first created from the database).
Thanks.
(SQL Developer v 18.1.0.095)
Nevermind, figured it out.
Just created a new subview with all the tables (from the disorganized subview), and selected Auto Layout #1 (then deleted the old subview, and renamed the new one).
Thanks
Trying to make me famous?
Nice – did not catch the new menu option in the new release. Have used all the others you mention and love them. Great option for making subviews for new releases and enhancements being rolled out on an agile project.
‘Galo’ was your codename! You’ve just outed yourself…
Not really. How many Galos do you have out there asking Data Modeler questions?