
Let’s do another tutorial. I’ve shown something very similar for running ad hoc SQL using the REST SQL API, from python, authenticating from a python script.
In this tutorial we will:
- import some fun data from CSV to a new table
- create a simple REST API, to GET data from it
- protect it with a privilege
- create an OAuth2 Client
- call our REST API using some python script from a Jupyter notebook
The Data
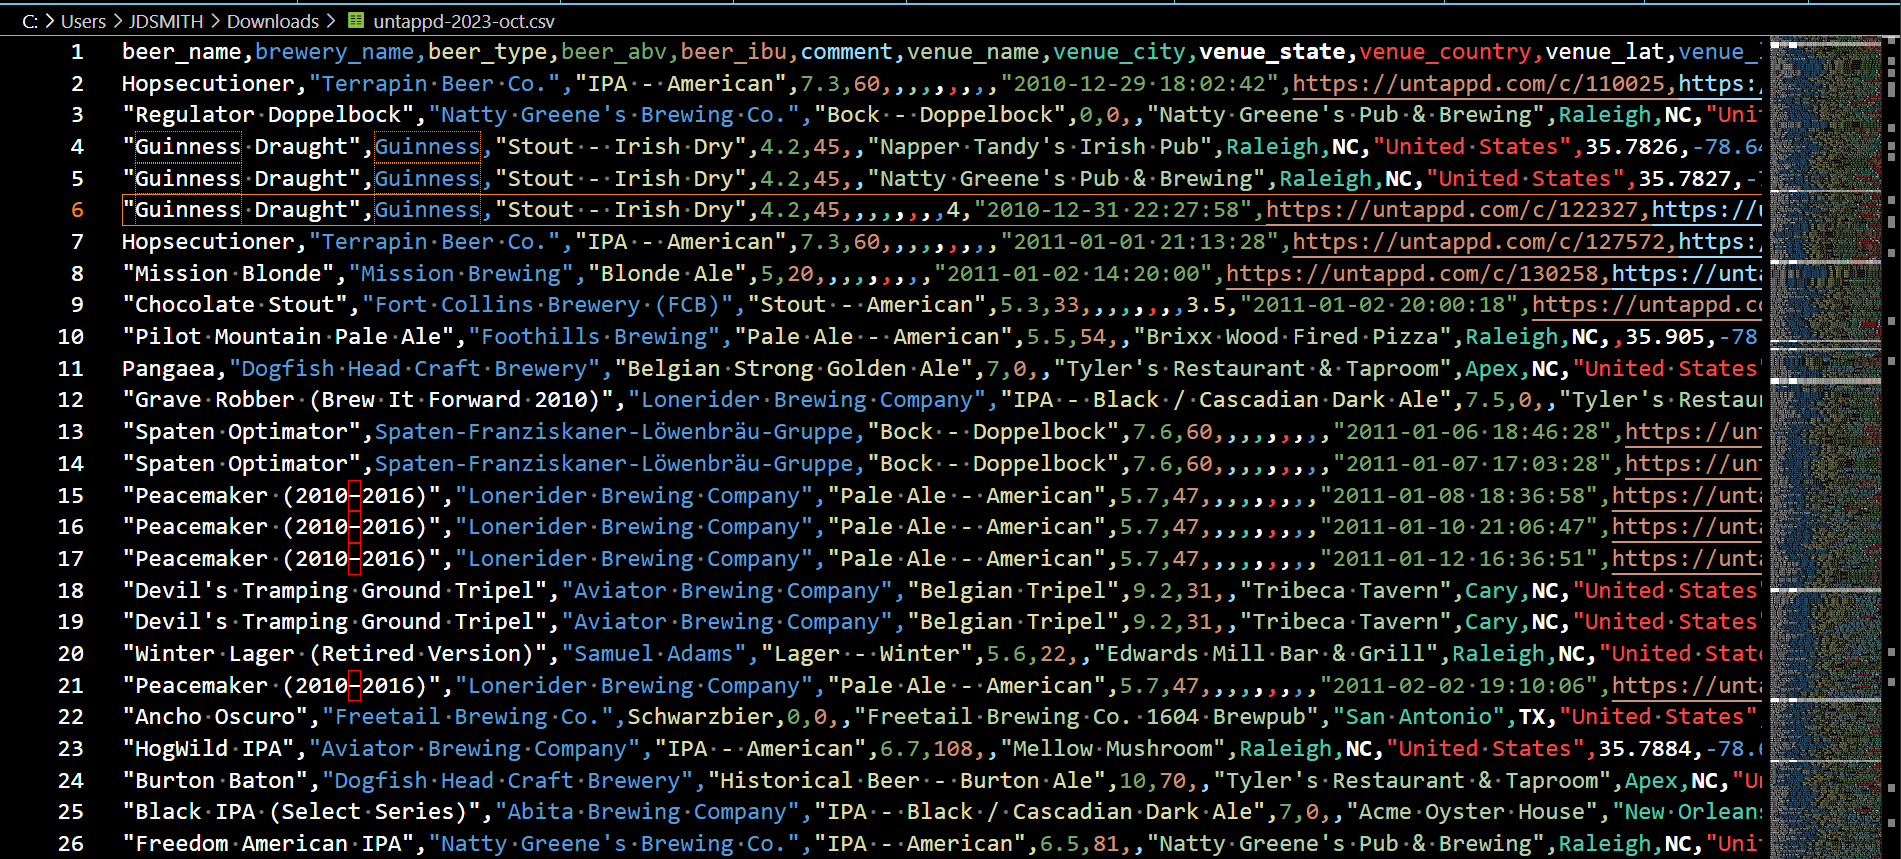
I like to log different beers I’ve tried using an a service called ‘Untappd.’ I’m a paying supporter, and one of the benefits is I can download my data as CSV or JSON. The CSV looks like this –
The Database & Schema
I have an Always Free Autonomous Database. You should get one, too.
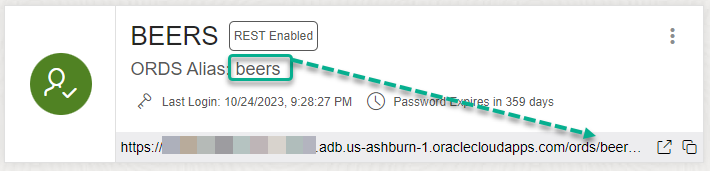
I’ve created a new database user, I’ve named ‘BEERS,’ and we want to use that to store our data. While, it may be tempting to just use the built-in ADMIN account, we want to shy away from using that for anything other than administration tasks.
When I create the user with SQL Developer Web, I simply toggle the ‘Web Access’ slider, which runs this code –
-- REST ENABLE
BEGIN
    ORDS.ENABLE_SCHEMA(
        p_enabled => TRUE,
        p_schema => 'BEERS',
        p_url_mapping_type => 'BASE_PATH',
        p_url_mapping_pattern => 'beers',
        p_auto_rest_auth=> TRUE
    );
END;
/
The p_url_mapping_pattern parameter defines how any REST resources from the BEERS schema will be named in the HTTP URIs.
My user has a few roles, include RESOURCE, CONNECT, and I’ve granted storage quota on the default tablespace.
Loading our Data
I simply drag and drop the CSV up to SQL Developer Web, and then I make a few changes to the default loading profile –
- rename “comment” to COMMENTS – I absolutely dread and avoid at all costs case-sensitive column names
- change quite a few of the VARCHAR2(4000)s to 255’s – not necessary, but it bothers me
- define the Primary Key as the CHECKIN_ID column
- change the check-in date field to be a DATE type and provide the proper NLS_DATE_FORMAT
Then I hit, ‘go!’ and do a quick query on the table and check the number of rows.
Building our REST API
I’m going to create a module named ‘examples’, a template named ‘python-requests/’ and a GET handler with a pretty simple SQL statement.
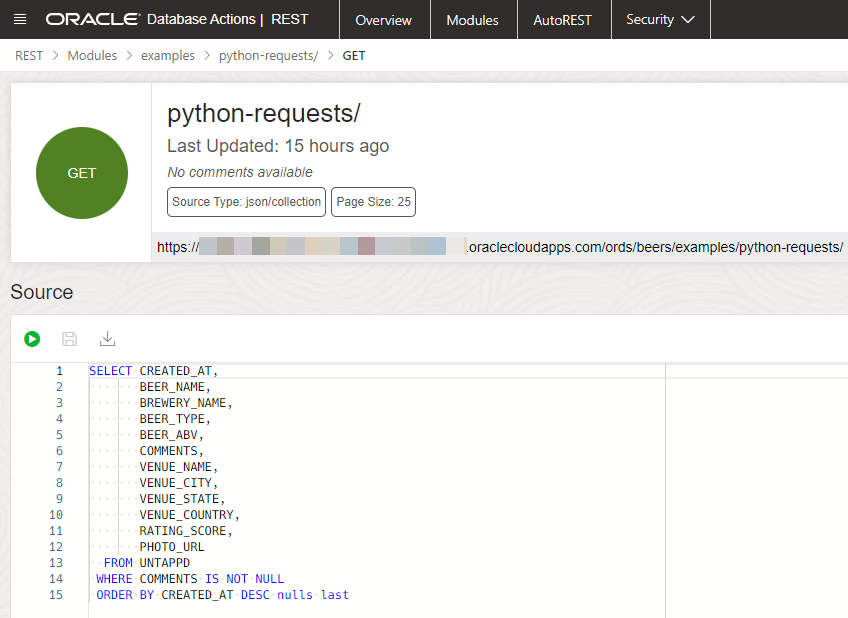
Calling that looks like this –

Adding Security
I’m going to create an ORDS Role (this is for HTTP Security, it’s not related to database security or authorization). I’ll be granting this role to our OAUTH2 client in a few moments.
I can use the REST Workshop’s Security wizards in SQL Developer Web, or I can run this code –
BEGIN
    ORDS.CREATE_ROLE(
        P_ROLE_NAME => 'beers_client'
    );
END;
/
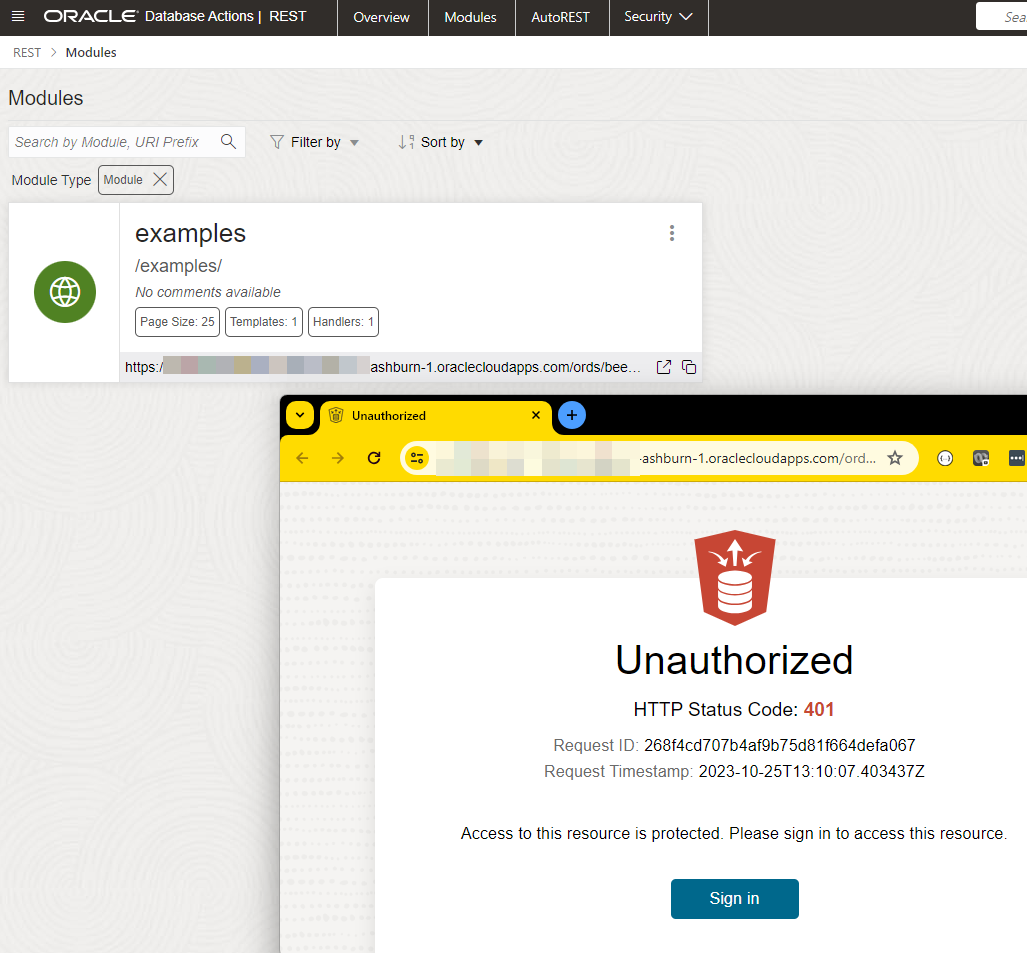
Now it’s time to create an ORDS Privilege. The Privilege is what adds the ‘security check’ to our REST APIs.
The privilege can be tied to either one or more modules, or some URI mapping patterns. I’m going to go with the simpler ‘route’ here and just explicitely tie this privilege to our examples module.
DECLARE
L_PRIV_ROLES owa.vc_arr;
L_PRIV_PATTERNS owa.vc_arr;
L_PRIV_MODULES owa.vc_arr;
BEGIN
L_PRIV_ROLES( 1 ) := 'beers_client';
L_PRIV_MODULES( 1 ) := 'examples'; -- this is the most important line
ORDS.DEFINE_PRIVILEGE(
    P_PRIVILEGE_NAME => 'untappd.module',
    P_ROLES => L_PRIV_ROLES,
    P_PATTERNS =>  L_PRIV_PATTERNS,
    P_MODULES => L_PRIV_MODULES,
    P_LABEL => 'untappd',
    P_DESCRIPTION => 'locking down our example module',
    P_COMMENTS=> ''
);
END;
Once that’s been executed, if I go back to our module, I can see that it’s status ‘Green’ that means it’s properly protected, and if I try to hit the REST API in my browser again, I get denied access.
Creating our OAuth2 Client
Well it’s fine that our REST API is protected now, but what fun is it if I can’t access it???
So let’s create it, here’s the code –
BEGIN
    OAUTH.UPDATE_CLIENT(
        P_NAME => 'beers_client',
        P_DESCRIPTION => 'access our beers example using oauth2 client credentials workflow',
        P_ORIGINS_ALLOWED => '',
        P_REDIRECT_URI =>'',
        P_SUPPORT_EMAIL => '[email protected]',
        P_SUPPORT_URI => 'https://www.thatjeffsmith.com/ask-a-question/',
        P_PRIVILEGE_NAMES => ''
    );
     OAUTH.GRANT_CLIENT_ROLE(
        P_CLIENT_NAME => 'beers_client',
        P_ROLE_NAME => 'beers_client'
    );

END;
Yes, I realize now that I named both the Client and the Role, ‘beers_client,’ that wasn’t intentional, nor required or recommended. They are arbitrary strings, just use something you’ll recognize once you see it.
However, once the client is created, we can see it in the REST Workshop, and even get our first bearer token.
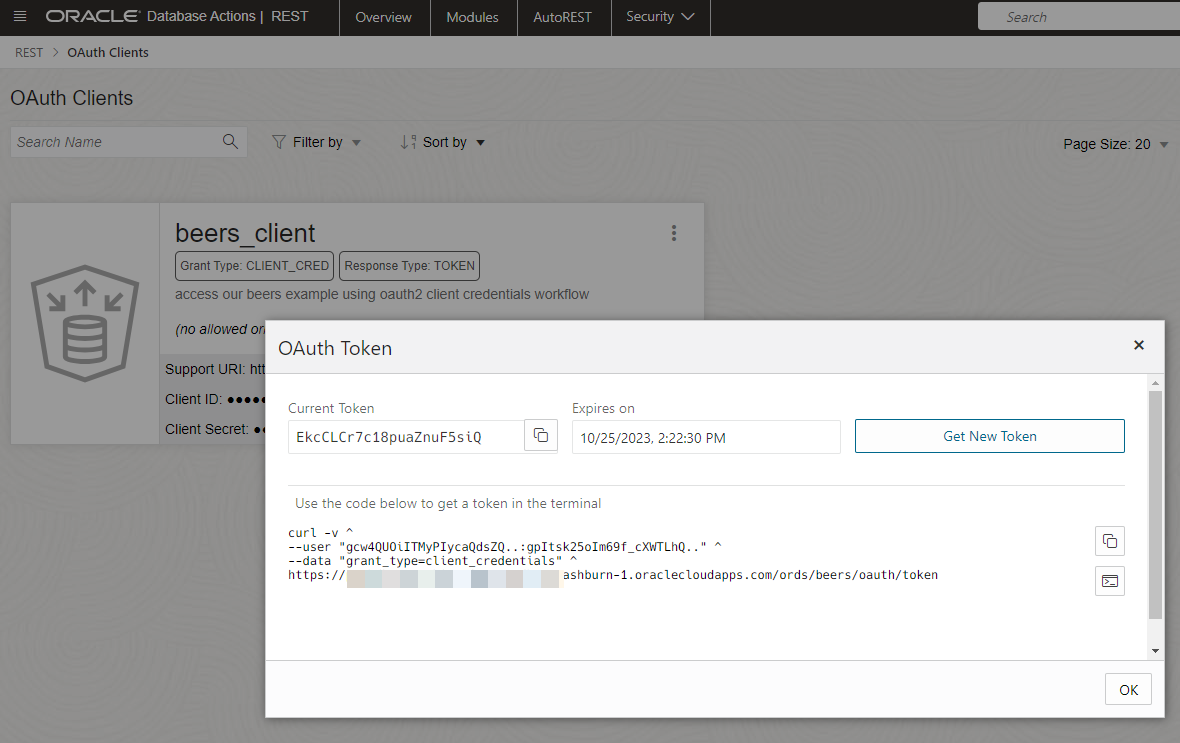
The curl code shows me what I need to know to do a GET request in a client like Postman or Insomnia. The important thing to get right is the Grant Type, or this will not work.
The Access token that’s returned from presenting the client Id and secret is good for 60 minutes. That can be configured…I just keep adding that to my request until it expires, in which case I can go get another token from the /token endpoint.
Jupyter & Python!
OK, now we’re ready to do stuff with our API. I’m not sure what I would do with my JSON responses that come back from our API calls, but I”m going to leave it to our data scientists in the audience to use their imagination.
I’ve written very similar code before, so it was easy to adjust to my scenario here.
- Import json, requests, oauth2 and requests_oauthlib
- fetch my bearer token, using my client ID and secret
- use requests.get to call the REST API, including said bearer token
- print the results
Now, what could my code be doing better?
I’m fetching a new token on every request, but they’re good for an hour. I could store that token in a local file or something, and make the request…if that fails, THEN I could request a new token.
Storing the client ID and secret, or hard coding them in the python code, not a great idea. I should probably be pulling those from a Secret / Wallet somewhere.
But, it ‘works.’ this is what I would call my ‘hello world’ scenario.
My Rig
My setup is pretty simple. I’m using Windows 11, and I’ve installed Juypter Notebook using PIP. Once the kernel/webserver startup, I just make sure I’m actually using Python 3.
It took me about 5 minutes to figure out how to get this up and running.
If I had to pick from using this or just the python extensions in VS Code, I’d probably go with VS Code…but I’m not doing anything in Jupyter that really takes advantage of the platform. Like, my Notebook is super basic.
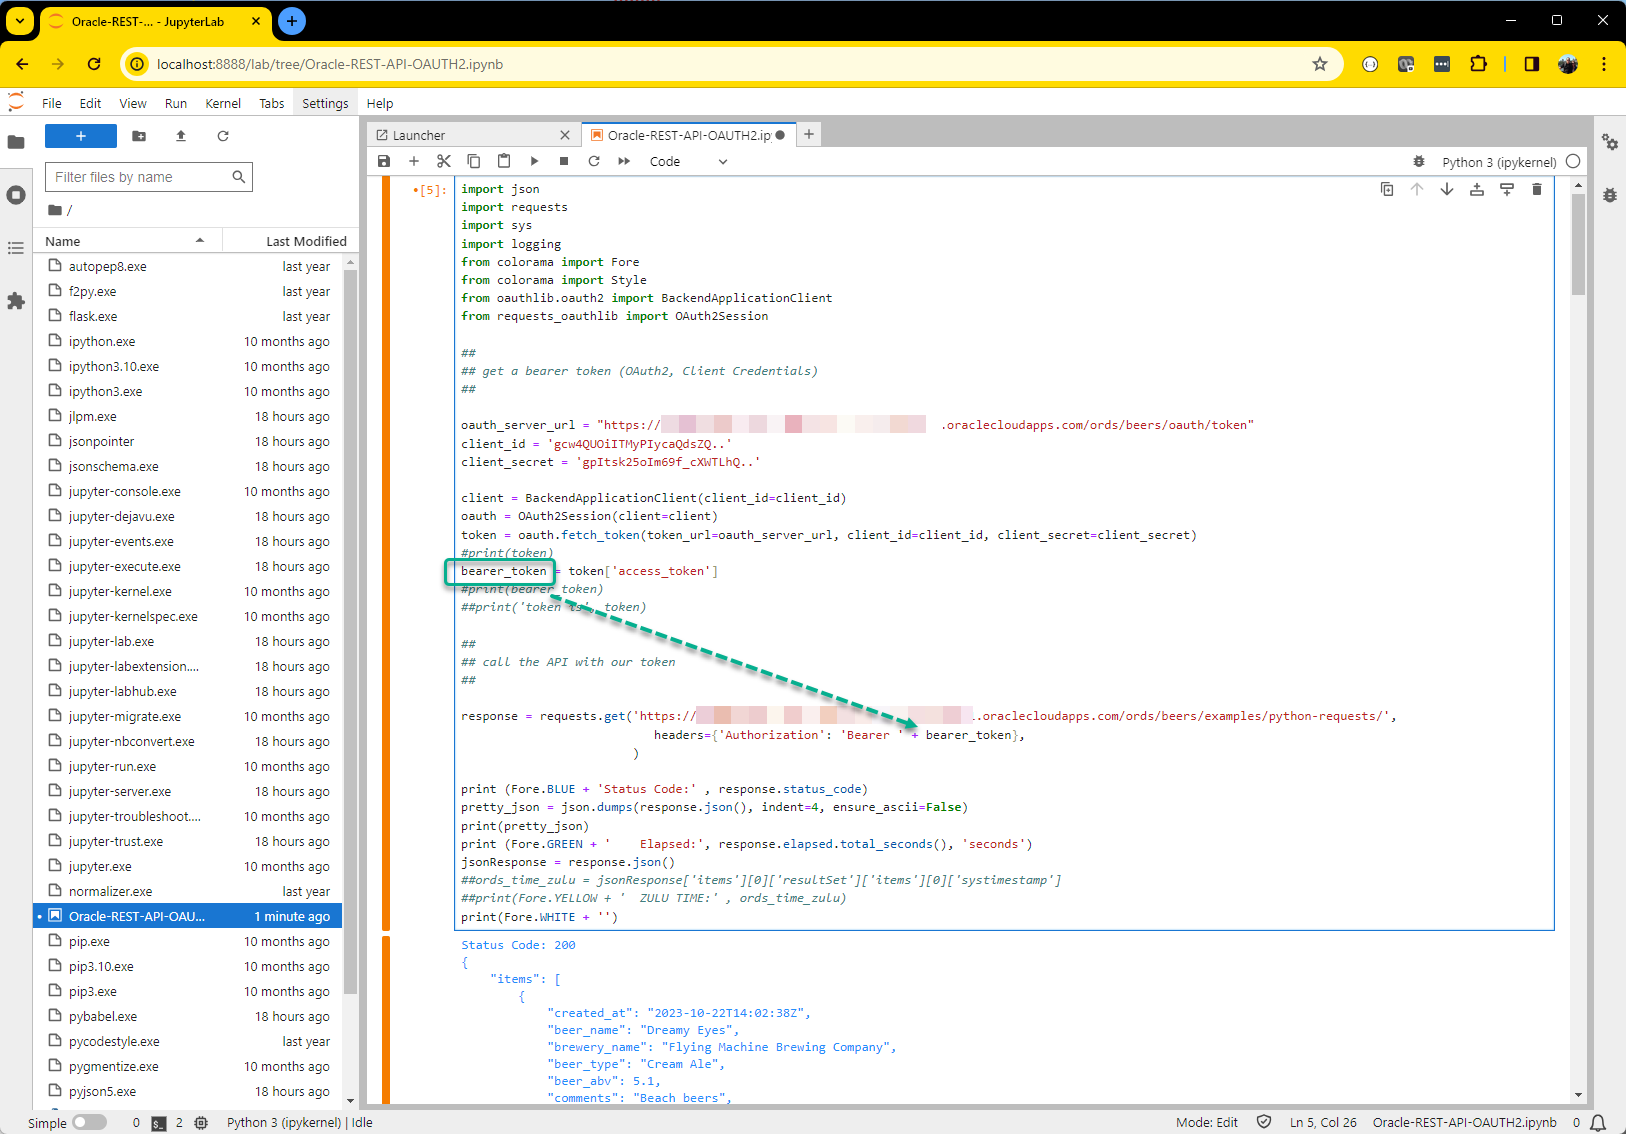
My Single Step Notebook
Basically, here’s all the python code, let’s run it.
I’ve annotated in the picture where I taken the bearer token from the oauth2 api response and append it to the GET request as a header.
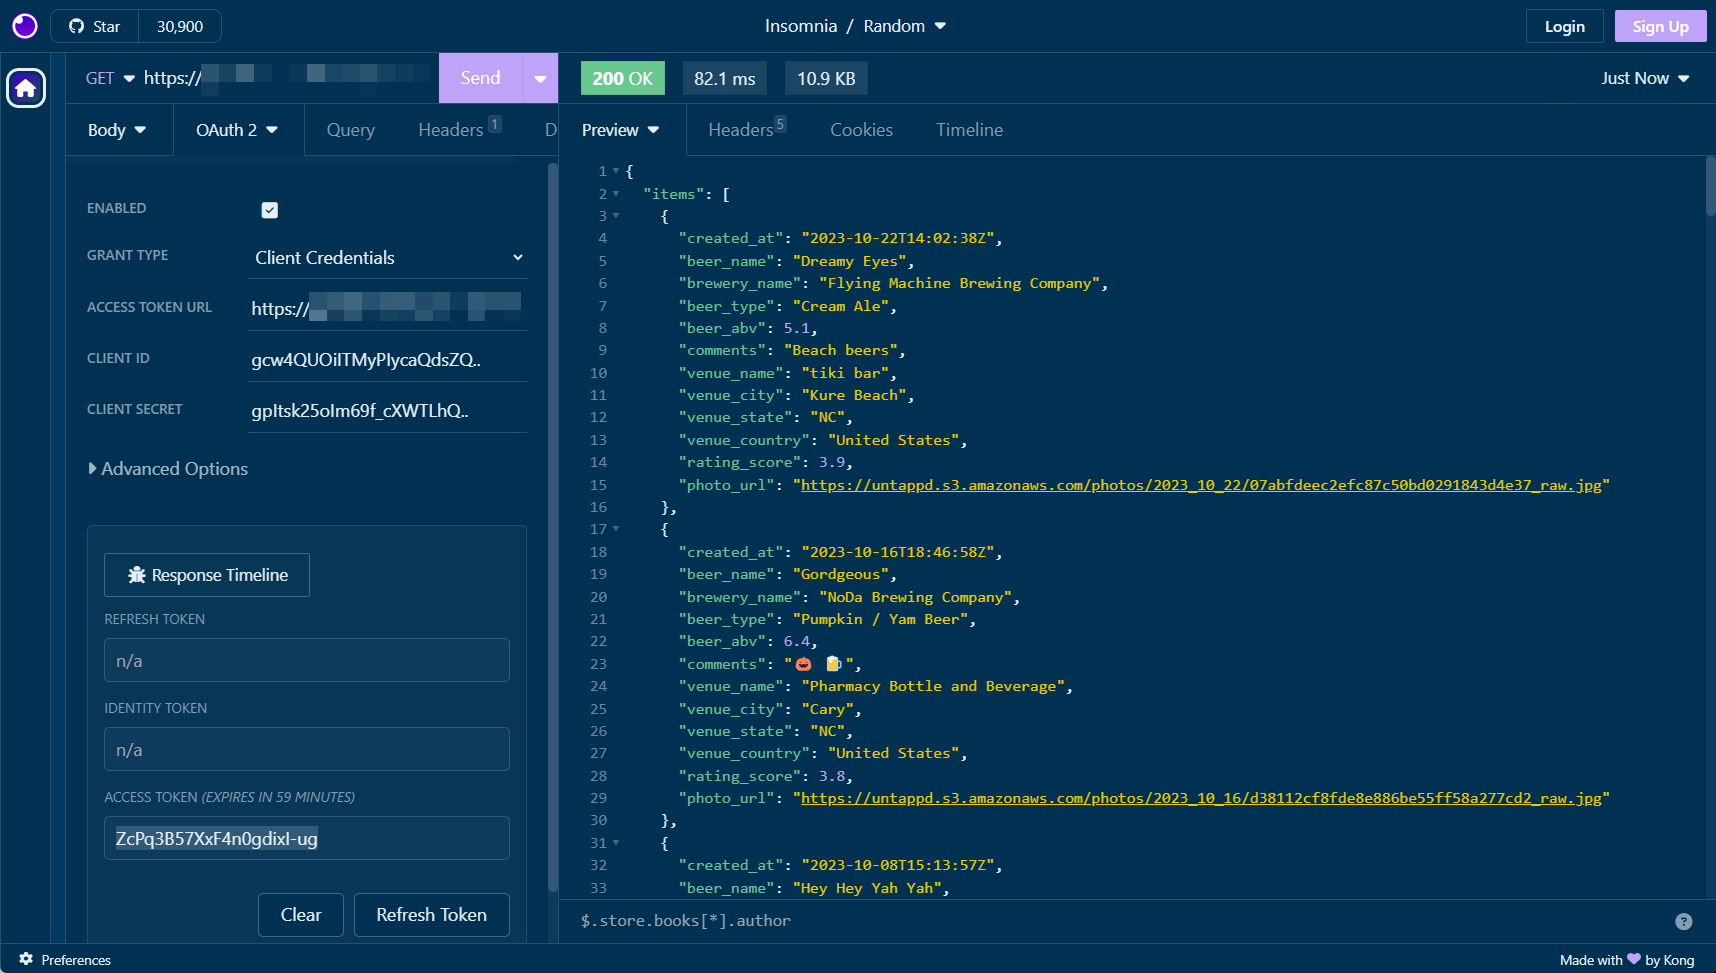
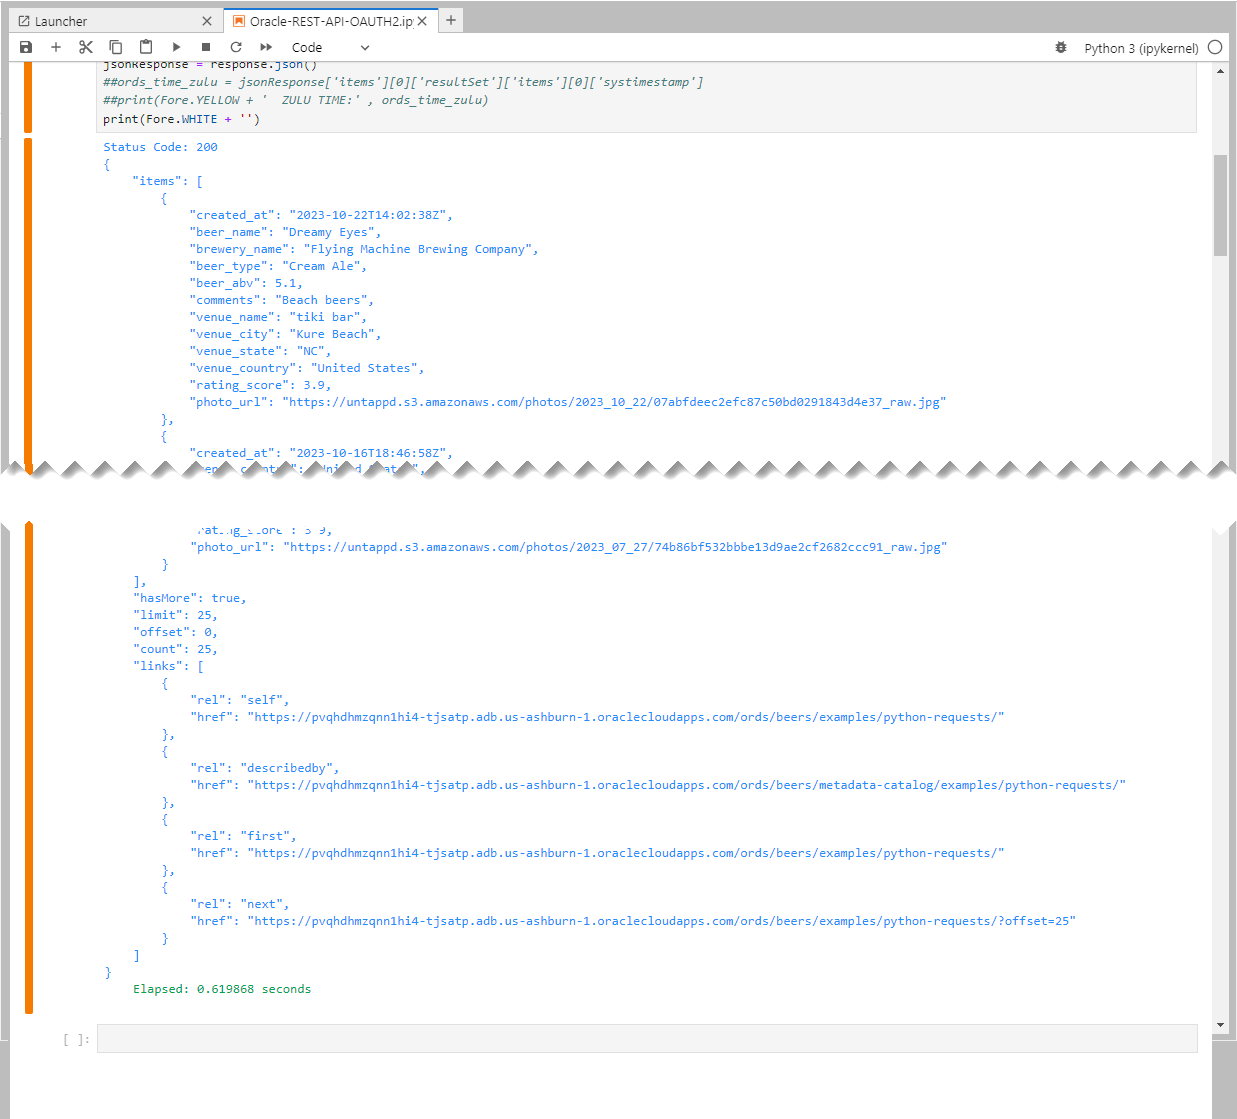
And the full response looks like this. Well, I’ve cut out a bunch of the response so you can see the beginning and end. I’m printing the status code, the response body, and ending on the elapsed time of the request.
The pretty JSON comes from this line of code –
pretty_json = json.dumps(response.json(), indent=4, ensure_ascii=False)Why use ensure_ascii=False? Because that allows me to see, get the printed emoji characters from my comment field vs the UNICODE escape character sequences.
Summary before I show you the code
Python makes working with HTTP and OAUTH2 and JSON really easy. This is just an example of using it to pull data from an Oracle Database via a REST API, vs using our python driver for Oracle Database and running SQL.
I’ll be playing more with Notebooks at some point and look forward to seeing what all the data scientists are raving about.
The Python Code
import json
import requests
import sys
import logging
from colorama import Fore
from colorama import Style
from oauthlib.oauth2 import BackendApplicationClient
from requests_oauthlib import OAuth2Session

##
## get a bearer token (OAuth2, Client Credentials)
##

oauth_server_url = "https://yourURLhere.com/ords/beers/oauth/token"
client_id = 'yourClientID..'
client_secret = 'yourSecret..'

client = BackendApplicationClient(client_id=client_id)
oauth = OAuth2Session(client=client)
token = oauth.fetch_token(token_url=oauth_server_url, client_id=client_id, client_secret=client_secret)
#print(token)
bearer_token = token['access_token']
#print(bearer_token)
##print('token is', token)

##
## call the API with our token
##

response = requests.get('https://yourURLhere.com/ords/beers/examples/python-requests/',
                           headers={'Authorization': 'Bearer ' + bearer_token},
                        )

print (Fore.BLUE + 'Status Code:' , response.status_code)
pretty_json = json.dumps(response.json(), indent=4, ensure_ascii=False)
print(pretty_json)
print (Fore.GREEN + '    Elapsed:', response.elapsed.total_seconds(), 'seconds')
jsonResponse = response.json()
##ords_time_zulu = jsonResponse['items'][0]['resultSet']['items'][0]['systimestamp']
##print(Fore.YELLOW + '  ZULU TIME:' , ords_time_zulu)
print(Fore.WHITE + '')

, and how to secure it!")

