
TL/DR; – jump to the bottom for the Movie!
Installing software CAN be fun.
But not when you’re in a hurry.
What if I told you, one could create and start using an Oracle Database, all from their browser, with NOTHING to install?
Now I know what you’re going to think, oh, he’s going to pitch SQL Developer Web again. And yes, I could, but instead I want to talk command line interfaces, specifically, SQLcl.

CLI’s are less heavy than a GUI, generally, quicker, and simpler. Plus you’re a nerd, and you all know that you get max nerd HP+ when you work from a command prompt!
When you’ve logged into the Oracle Cloud (OCI), you get an immediate shortcut to open a shell prompt directly in your browser – this is called Cloud Shell.
Check the upper right hand corner of your OCI console.


Now remember, I said ‘NOTHING’ to install. So how do we get into the database (this would be a database that you have already created) ?
Our modern Oracle Database CLI is already installed and ready to go in Cloud Shell, simply type ‘sql’.
Now, before we do that, we need to get our Database Wallet. For maximum security, this is required to access your Autonomous Database – inside or outside the OCI network.
If you know your database’s ID, then you can easily ask OCI to download your wallet file directly to your Cloud Shell environment – just use the ‘oci’ command. (Docs)
Here’s an example, and no, that’s not the id for my ATP database, nor is my luggage combination 1-2-3-4-5.
oci db autonomous-database generate-wallet --generate-type ALL --file mywallet.zip --password CaN3s0v3rBrU1nS --autonomous-database-id ocid1.autonomousdatabase.oc1.iad.abcdefghijklmnopqrstuvwxyz123
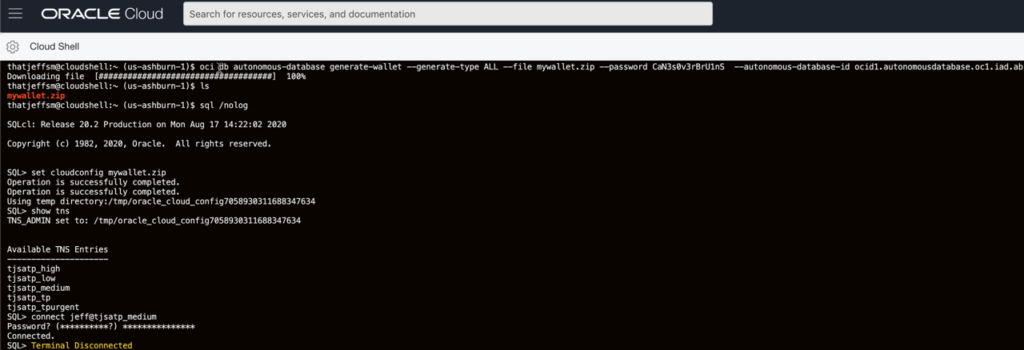
Inside that Zip file are a few things – the actual wallet required for a SSL (encrypted end to end conversation with your database) and a TNSNames.ora file are the most interesting things for getting connected to our database.
SQLcl is simply launched with the ‘sql’ command.
We want to start it with the /nolog flag, because first we’re going to setup our ENV for the connection. That’s accomplished, easy-peasy with
set cloudconfig mywallet.zip
Our TNS info is immediately available. We can see what databases are defined by using the SHOW command.
show tns
What comes back is a list of the services for our autonomous databases. My Autonomous Transaction Processing instance has a TP Urgent, TP, high, medium, and low service. Each of these have different affects on how your session will be allocated system resources – things like parallel processes for executing SQL and CPU.
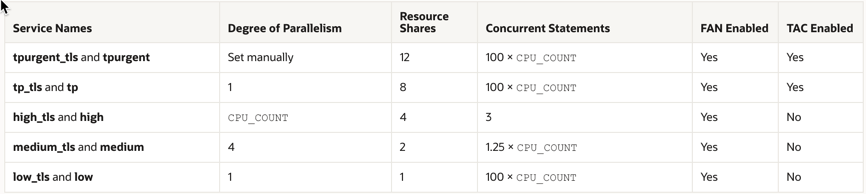
I’m going to connect to the ‘medium’ service.
connect jeff@tjsatp_medium
The database expects a password, it prompts for it, and it I get it right, I’m in!
If this is your first time into your database, use the ADMIN account. I’ve been in before, and had created a database user called ‘JEFF,’ so i’m using that.
Session Times Out? That’s ok!
Better than ‘ok’, it’s good! If you’re away from your browser/machine, you don’t want to leave your system vulnerable – even if it’s just your pets or curious kids.
If your session does time out, you can reconnect, and your ZIP fill will still be there.

Now what?
Now you can start working with your Oracle Database.
- create users
- create tables, stored procedures, views
- load data
- run queries
- files files as blobs to your table(s)
- export tables as local json, csv, xml files
- see what you have/poke around
Let’s try a few things, right quick.
Firstly, your SQLcl command history WILL persist across sessions. This is handy, because remember, I’m lazy.
You can simply type ‘history’ to get a list of everything, or you can Up or Dn Arrow through the SQL history right at the prompt.
And while I’m in here, I’m going to setup my CLS alias, because typing ‘clear screen’ gets old.
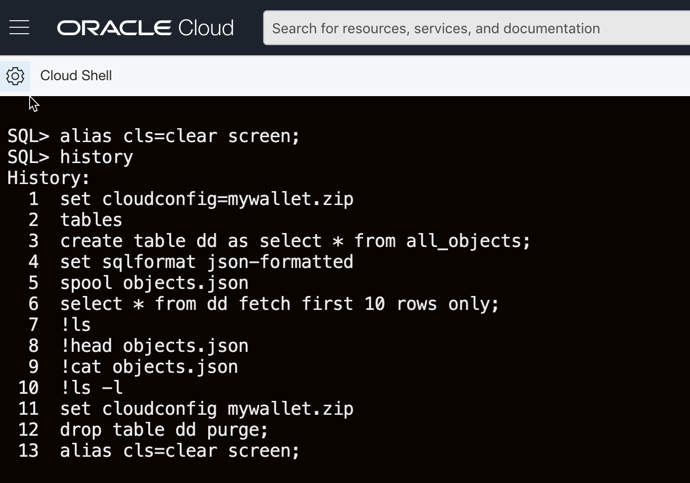
If you have a habit of doing CONNECT in your SQL sessions, no worries, SQLcl is smart enough to NOT write those to the history, so your passwords will remain off the filesystem.
Now let’s create a table, put some data in it, and spool it out as JSON to the CWD.
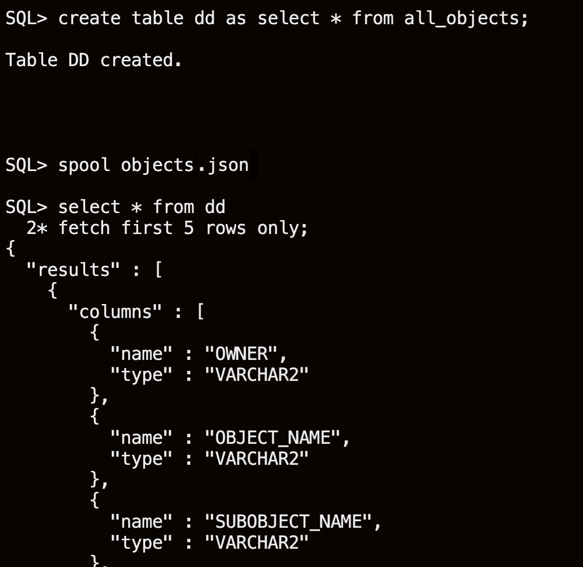
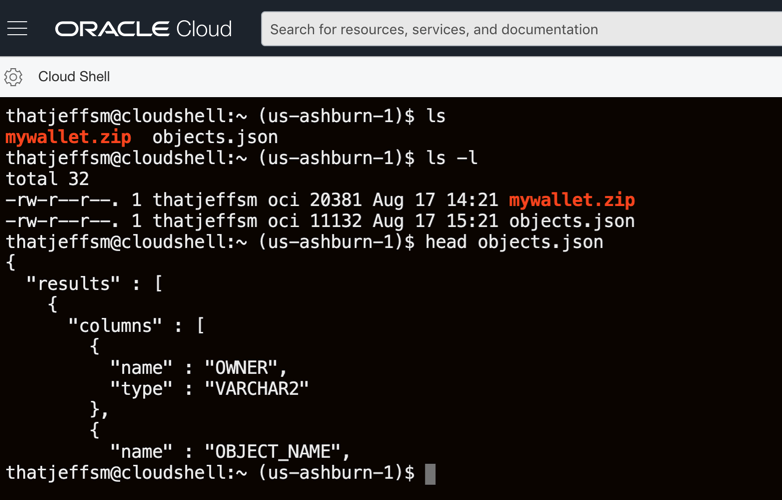
Exit from SQLcl, and check out our new json file.
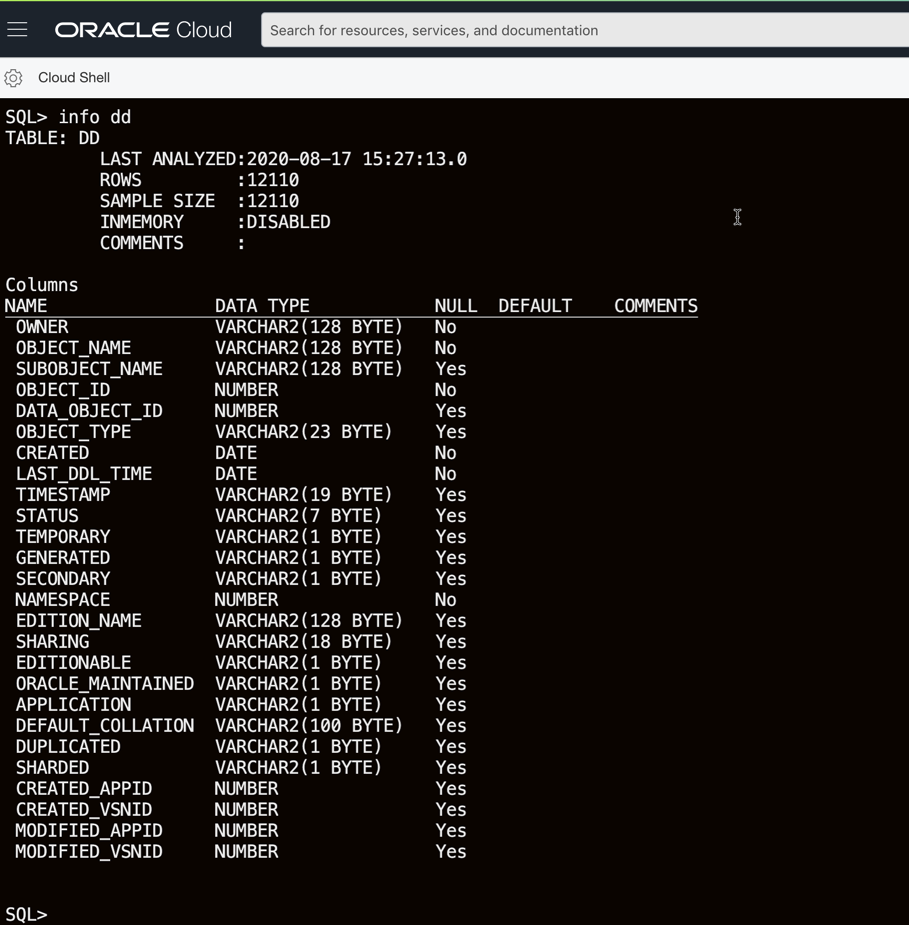
Let’s go back into our db and see just what that DD table is.
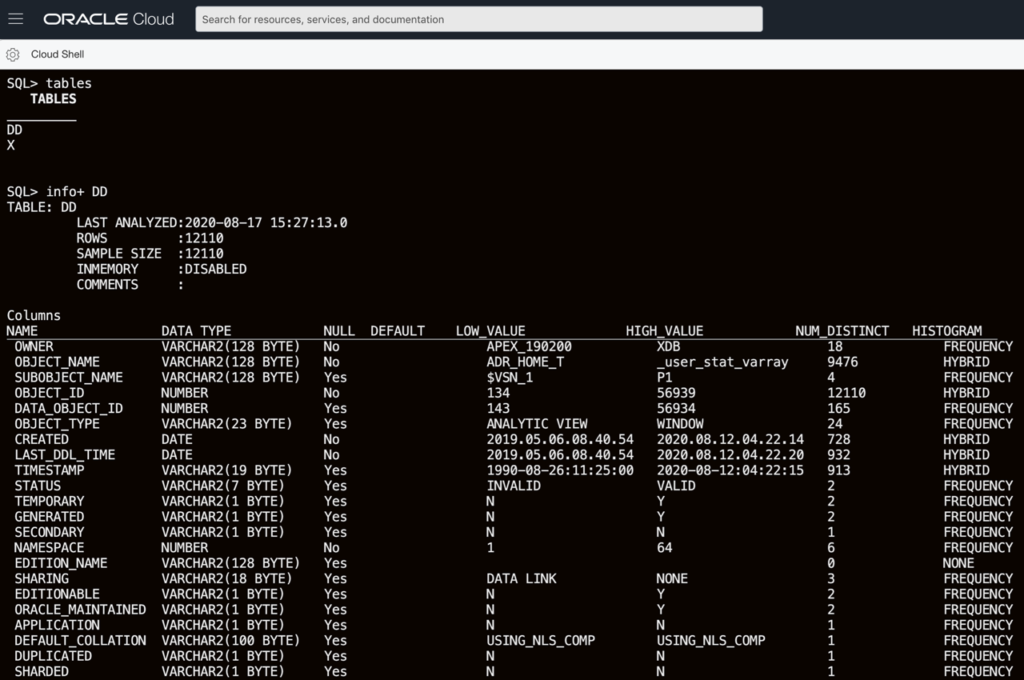
As you can see, the Autonomous DB collected stats for me on my table and had a fun time creating histograms for quite a few of the columns.
Don’t have a database yet? You can create that from the CLI too.
My colleague Todd has a great post that shows some of this, but starts by actually creating a new Autonomous Database instance from Cloud Shell too!
Todd’s a great follow for learning any/everything on OCI if you’re a developer. He’s a polyglot, so expect a bit of everything in his feed. Or follow him on Twitter, https://twitter.com/recursivecodes