
You have some data in an Oracle Database in your data center or laptop or docker or VirtualBox or…you get the idea.
And, you have an Autonomous Data Warehouse or Transaction Processing (ADW & ATP) Database running in the Oracle Cloud.
How do we get your data from your ‘old’ database up to your Cloud?
If you have SQL Developer and access to Data Pump, then you can our wizards to make this a bit easier. This post will step you through how to make that happen.
But first…
Requirements
- Preferably SQL Developer version 18.4 (but 18.3 will be OK)
- SQL Developer running on the same machine your database is*
- Privileges to run Data Pump
- An Autonomous Cloud Instance with at least one Credential defined to your OSS ‘locker’
How it Works
- Export Job is Defined, as Well as an Import
- Credentials are provided so we can
- move the DMP file up to OSS after the export runs*
- access the DMP file from your Cloud instance for the import
- The export runs, file is copied up to OSS
- The import runs, file is read from OSS
- That’s it.
So, let’s get started!
1. Connect to your Local DB and Start the Export Wizard
Right, so you need to get SQL Developer running wherever your Oracle Database is. For me, that means opening it on my Oracle Linux desktop via my VBox VM.
move the DMP file up to OSS after the export runs* –This is the bit that requires us to have SQLDev running on the same box.
We don’t yet have it setup to be able to SSH into the server to move the files up to OSS – that might change later this year. So for now, start SQL Developer on your database server.
Then, once connected, I open the DBA Panel and proceed to the Data Pump folder, and start the Export Wizard.
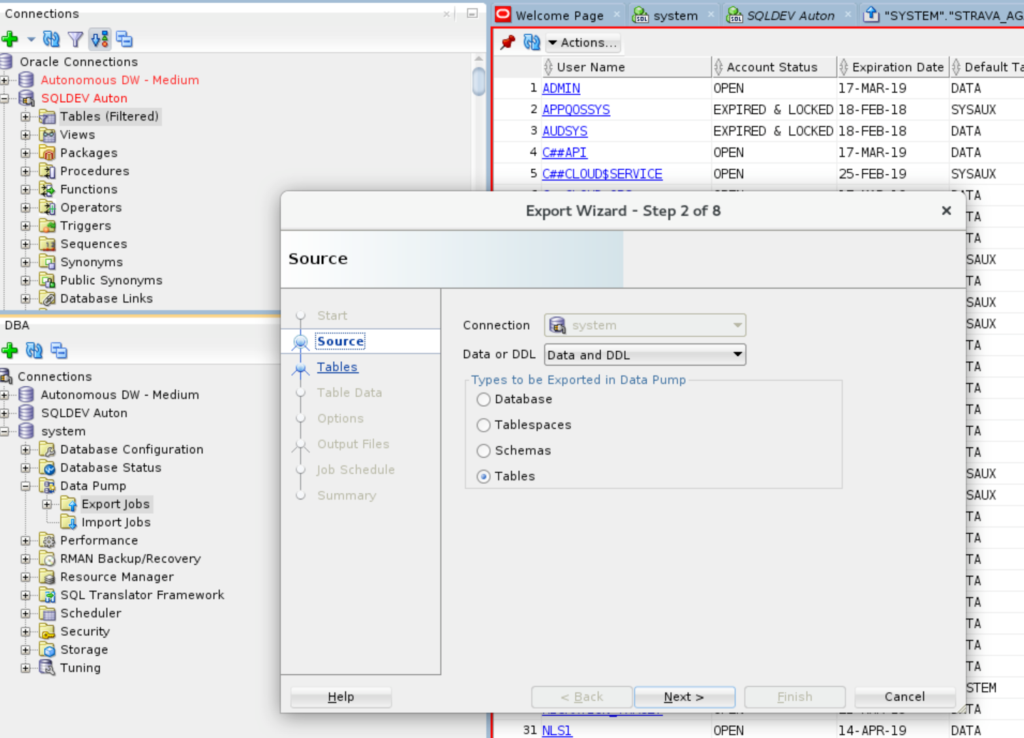
2. Walk the Wizard
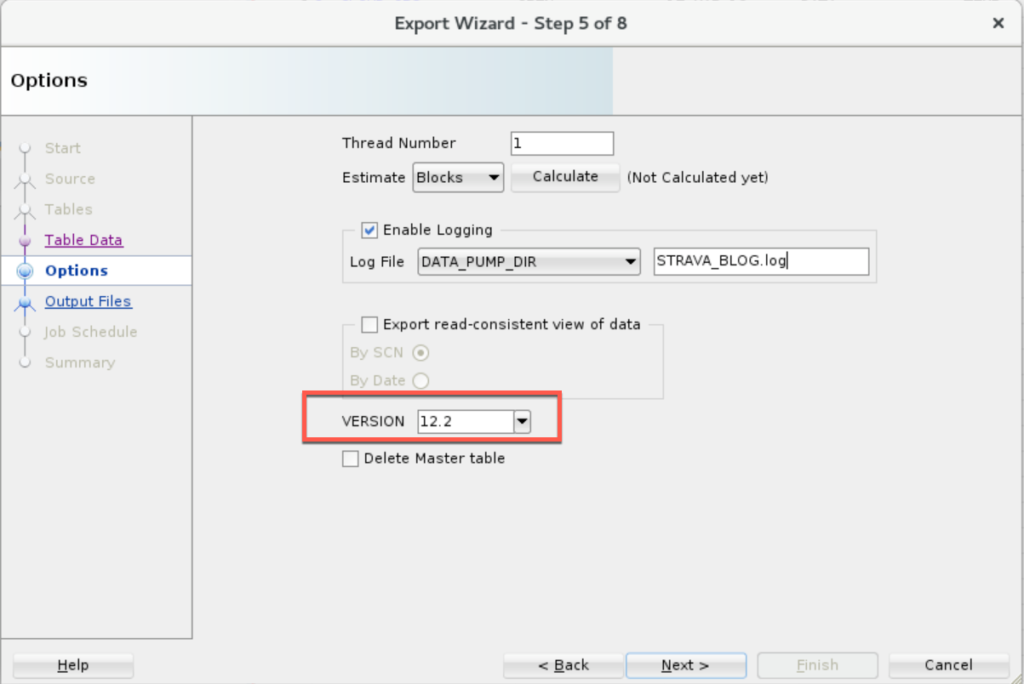
I’m data pumping from an 18c instance and I’m going to a 12cR2 Cloud instance. So I need to mind the COMPATIBILITY!
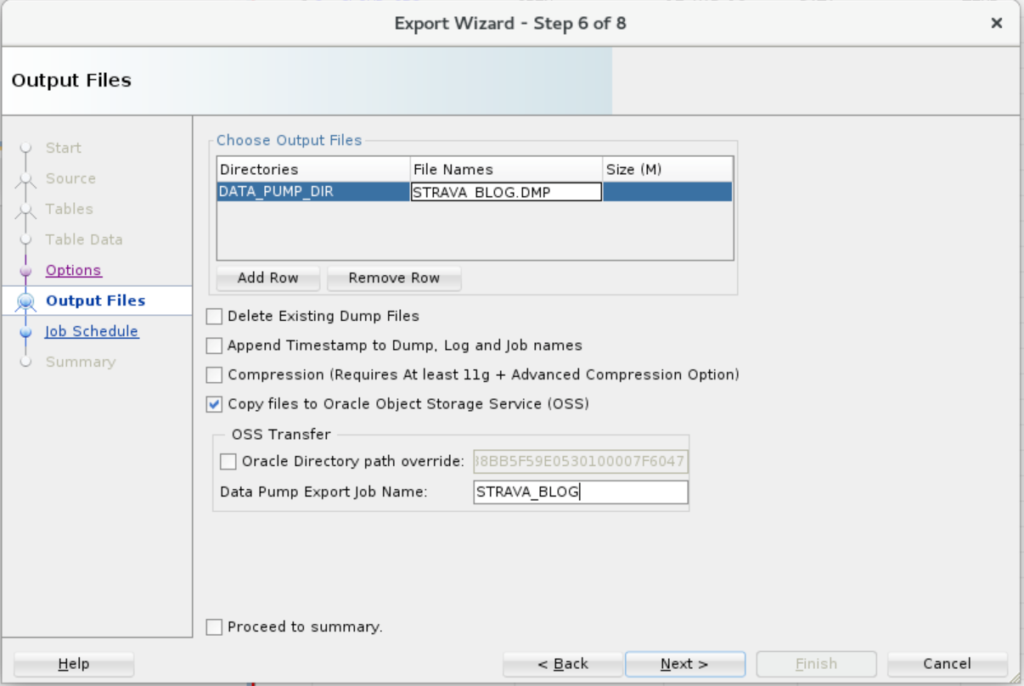
3. Check ‘Copy Files to OSS’
If your Oracle Directory is defined with a relative file path, e.g. ../something/something – you’ll need to use the ‘Oracle Directory path override’ so SQL Developer can FIND where you put the DMP when we go to move it up to OSS.
4. Define the Cloud Import Job
Now you get to tell us WHERE the IMPORT job is going to run, and how to access the file(s) in OSS. You’ll need that credential in your Cloud Database already defined so you can reference it here.
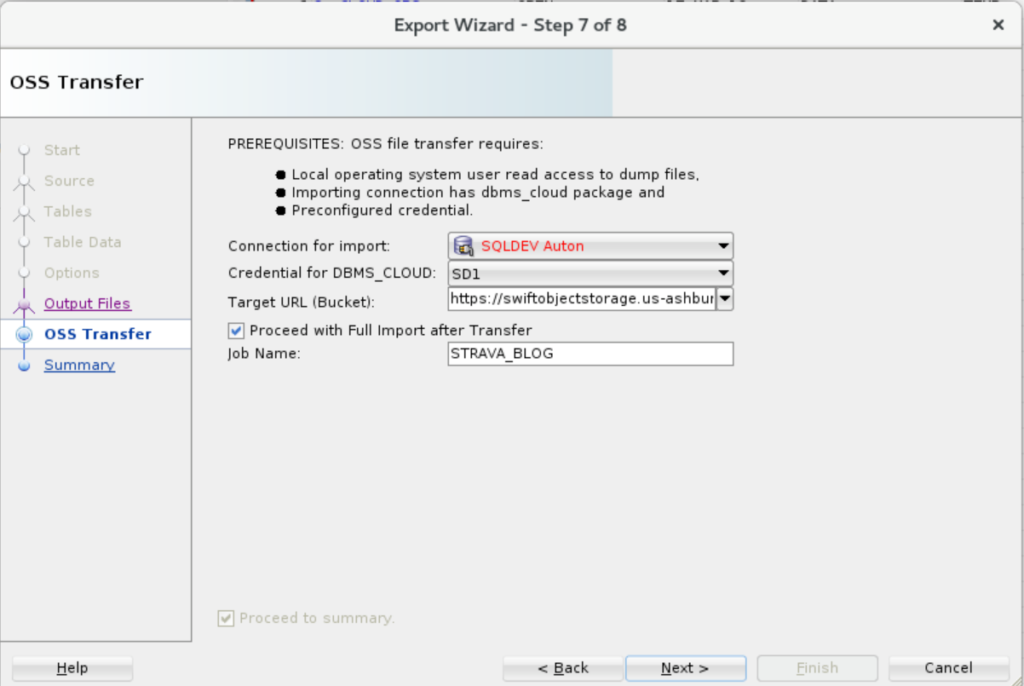
The Target URL is the HTTPS URL for your S3 ‘bucket’ in OSS. You don’t need a trailing ‘/.’
Also note there are no IMPORT job options per se – so if you need to remap a SCHEMA or something ‘tricksy’ – you can un-check ‘Proceed with Full Import after Transfer.’ –> We’ll talk about how to pick up from this and run the IMPORT later at the end of this post.
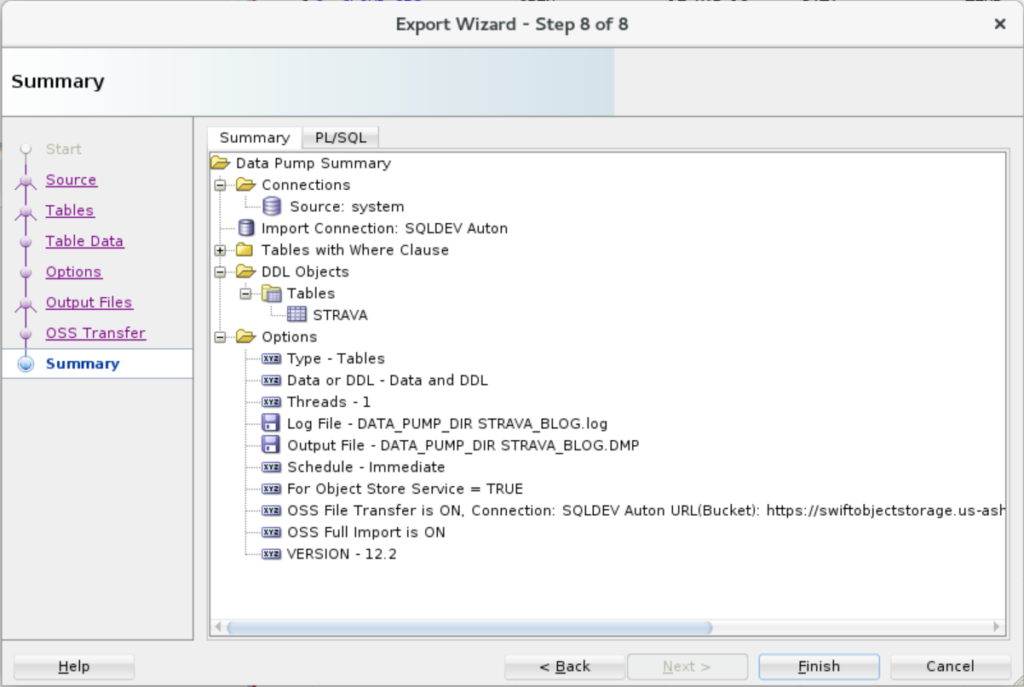
5. Finish and Execute!
Review your settings. If you like, go-go-go.
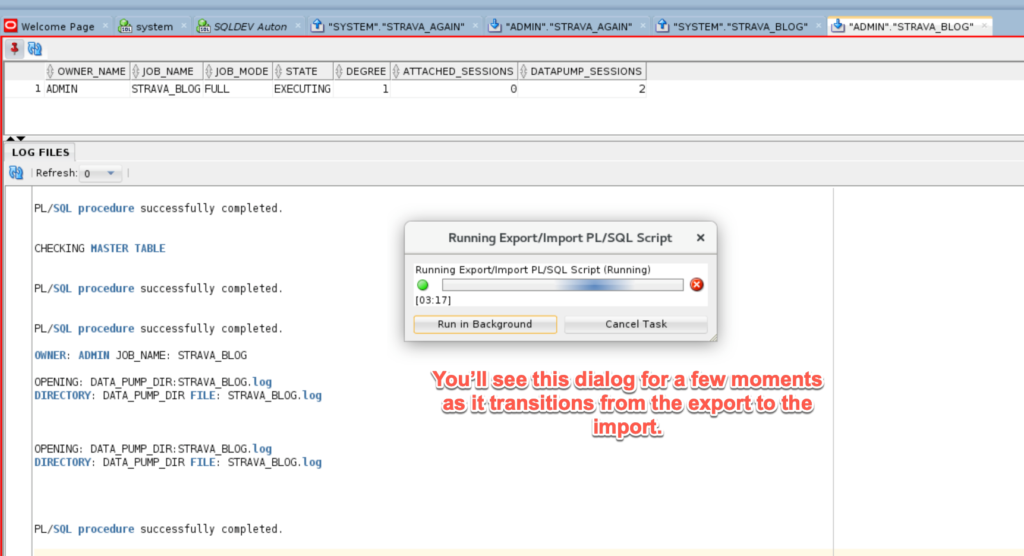
6. Watch it Run, Review the Results
As it’s running you’ll get this dialog…
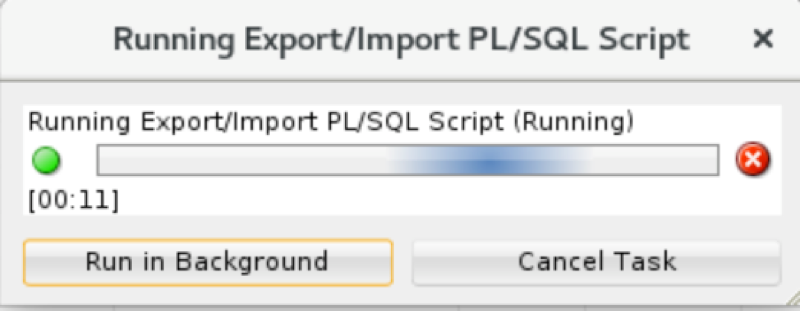
This will be up for the entirety of the data pump export running AND the file being copied up to OSS. The size of the file(s) will determine how long you wait, as well as your network throughput.
This took about 3-4 minutes for me on this small table. We are working on performance improvements for handling large files going over the network for version 19.1 – we’re looking at several magnitudes of order in performance improvement though.
In the meantime, you might want to take advantage of the COMPRESS option if you have it licensed and available on premises.
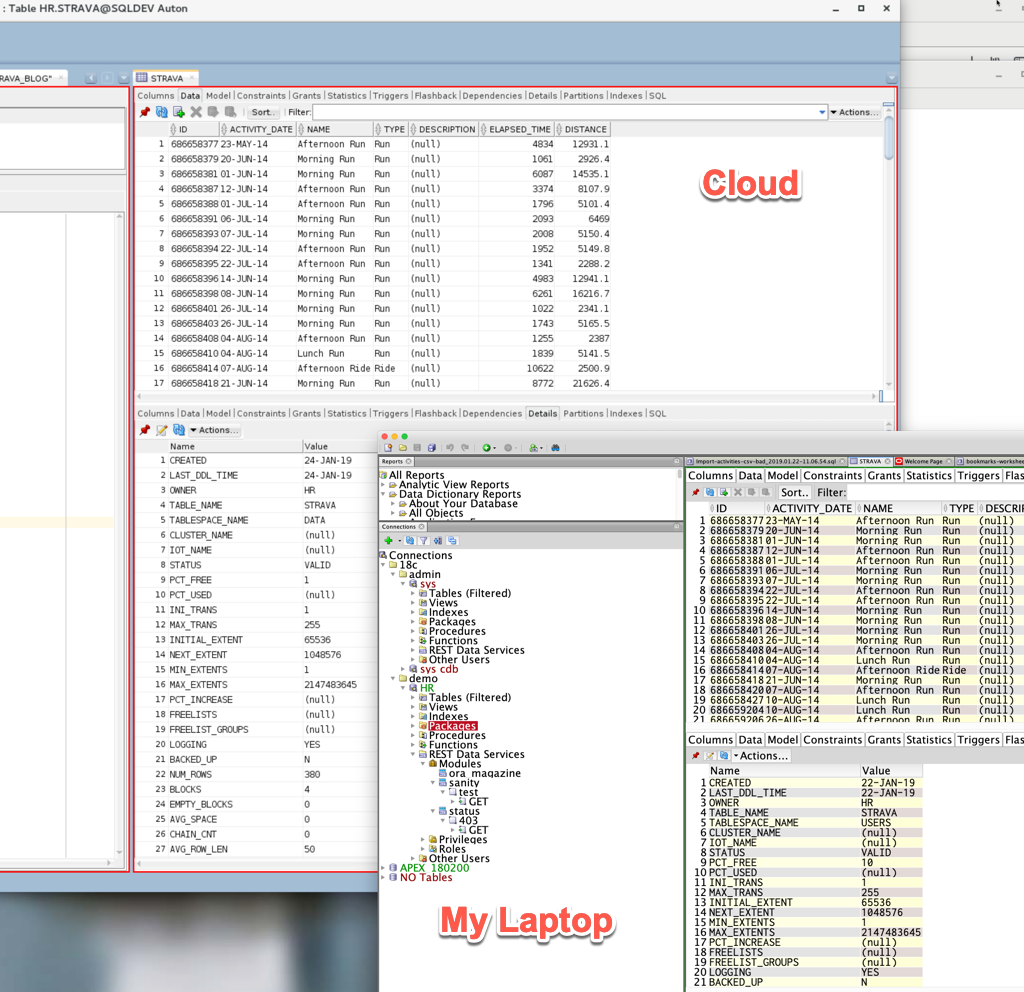
7. Play with your new tables!
Nothing special here. Once the job has finished, and assuming you didn’t run into any problems:
- I forgot to set the COMPATIBLE to 12.2
- I forgot to create my HR user/schema
…you can just start using your SQL and PL/SQL magic.
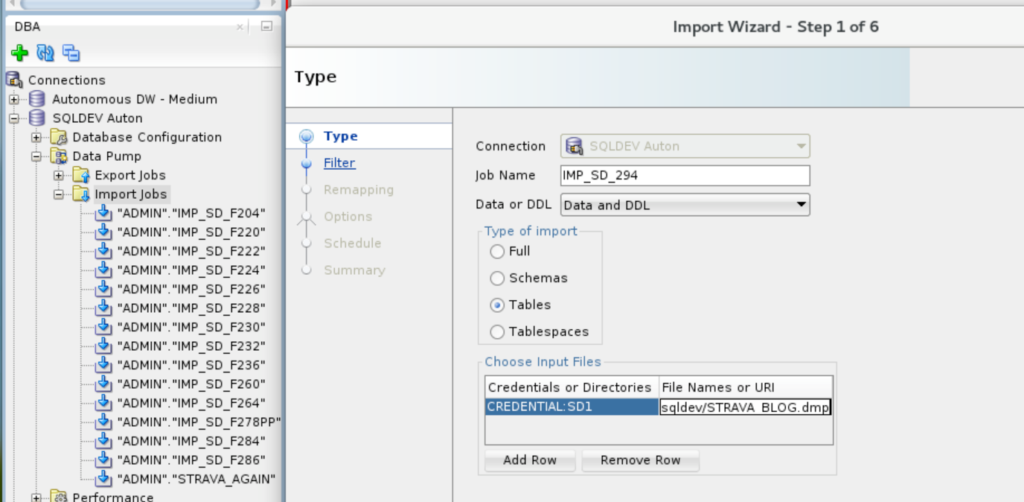
But, I already have my DMP files in OSS!
Awesome, all you need to do is make sure you have a CREDENTIAL in your Autonomous instance.
Then, go back to the DBA panel and start the IMPORT Wizard from your Cloud connection.
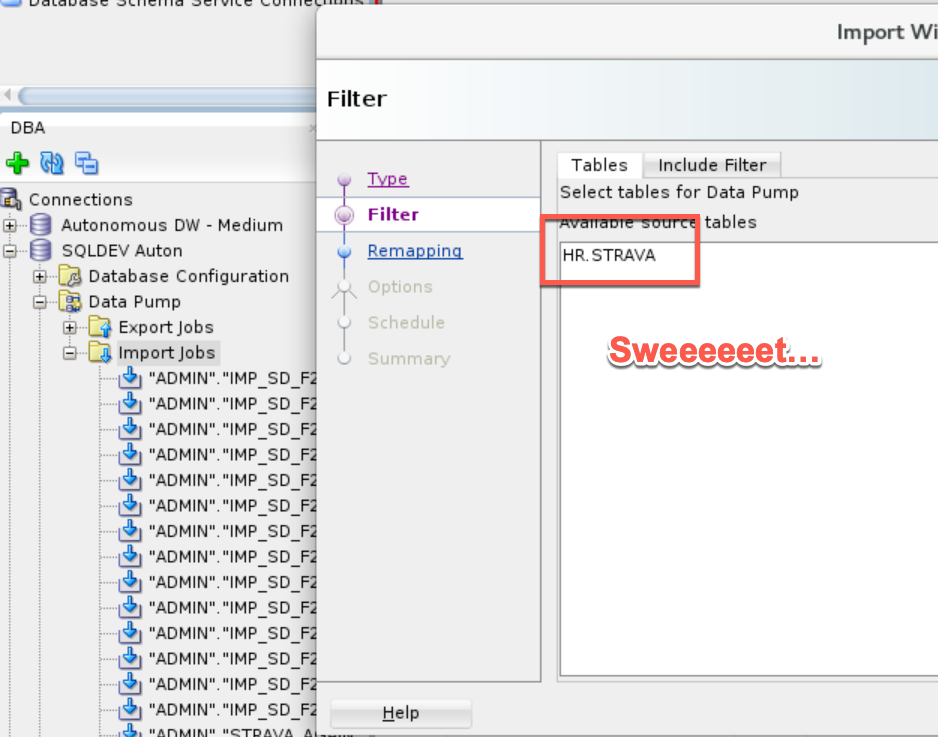
We don’t have an ‘OSS Browser’ – so you’ll need the URL to your dump files handy, and just copy/paste them in.
On the next screen, you’ll know if it’s going to work or not.
Any Questions?
We have plans to make this easier and faster in 2019. Hit me up with your feedback here.
If you’re curious, I was connected to an Autonomous Data Warehouse Cloud Service, but should be exactly the same process as Autonomous Transaction Processing – assuming you’re not trying to move up an object type that’s not supported in the target service.


2 Comments
That Looks Great. Is there Any Release Date for Sql*Dev 19.1? Q1/Q2 ?
Thanks Marco
Every 3 months is the plan, so end of March would be the next target.